一、环境搭建与项目创建
1.1 安装 Node.js 与 npm
对于中国大陆用户,建议将 NPM 源设置为国内的镜像,可以大幅提升安装速度。
bash$ npm install -g cnpm --registry=https://registry.npmmirror.combash$ cnpm install [name]
安装 Node.js
去Node.js的官网下载安装程序 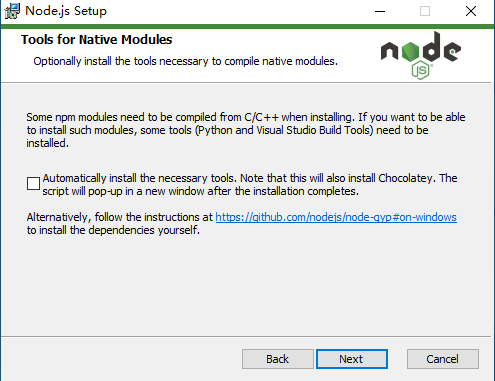 不必勾选,一路Next
1.2 安装 Vue
# 最新稳定版
$ npm install vue@next1.3 安装 Vue CLI
CLI 工具假定用户对 Node.js 和相关构建工具有一定程度的了解。如果你是新手,我们强烈建议先在不用构建工具的情况下通读指南,在熟悉 Vue 本身之后再使用 CLI。
$ npm install -g @vue/cli之后执行命令查看是否安装成功
$ vue -V

@vue/cli 5.0.81.4 创建与启动项目
创建项目
- 新建一个存放项目文件的目录,在其中执行
$ vue create <project-name>

Vue CLI v5.0.8
? Please pick a preset:
  Default ([Vue 3] babel, eslint)
> Default ([Vue 2] babel, eslint)
Manually select features- 或者你可以执行以下命令,启动一个GUI窗口进行项目管理
$ vue ui启动项目
 $ cd <project-name>
$ npm run serve之后就可以看到Vue大大的Logo了
二、Vue 核心特性
2.1 模板语法
2.1.1 插值与 v-html 指令
使用 v-html 指令用于输出 HTML 代码:
<div id="example1" class="demo">
    <p>使用双大括号的文本插值: {{ rawHtml }}</p>
    <p>使用 v-html 指令: <span v-html="rawHtml"></span></p>
</div>
<script>
const RenderHtmlApp = {
  data() {
    return {
      rawHtml: '<span style="color: red">这里会显示红色!</span>'
    }
  }
}
Vue.createApp(RenderHtmlApp).mount('#example1')
</script>2.1.2 属性绑定 (v-bind)
HTML 属性中的值应使用 v-bind 指令。
<div v-bind:id="dynamicId"></div>对于布尔属性,常规值为 true 或 false,如果属性值为 null 或 undefined,则该属性不会显示出来。
<button v-bind:disabled="isButtonDisabled">按钮</button>2.2 组件系统
2.2.1 父子组件定义与使用
在工程目录 /src 下创建 components 文件夹,并在 components 文件夹下创建一个 firstcomponent.vue 并写仿照 App.vue 的格式写一个组件。
<template>
  <div id="firstcomponent">
    <h1>I am a title</h1>
    <a> {{ author }} </a>
  </div>
</template>

<script type="text/javascript">
export default {
  data () {
    return {
      author: "第一个子组件"
    }
  }
}
</script>

<style>
</style>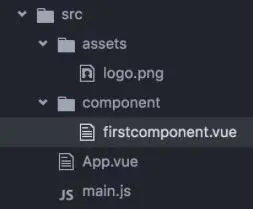
在 App.vue 中使用组件
- 引入组件:在
<script>标签内的第一行写:
import firstcomponent from './components/firstcomponent.vue' // 假设 firstcomponent.vue 在 components 目录下- 注册组件:在
<script>标签内的data代码块后面加上components: { firstcomponent }
export default {
  name: 'App', // 建议为组件提供 name 属性
  data () {
    return {
      msg: 'Hello Vue!'
    }
  },
  components: { firstcomponent }
}- 使用组件:在
<template>标签内加上<firstcomponent></firstcomponent>
<template>
  <div id="app">
    <img src="./assets/logo.png">
    <h1>{{ msg }}</h1>
    <firstcomponent></firstcomponent>
  </div>
</template>2.2.2 全局组件
- 使用更为方便,不需要声明,直接用
- 在
main.js中引入一次并使用Vue.component('组件名', 组件对象) - 所有的组件通过组件名使用
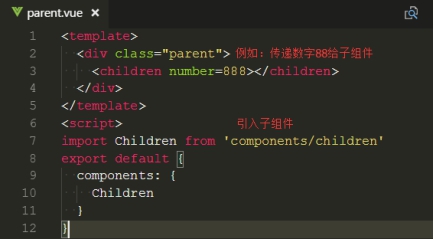
2.2.3 父组件向子组件传递数据 (Props)
① 定义父组件
父组件传递 number 这个数值给子组件。如果传递的参数很多,推荐使用 JSON 对象 {} 的形式。
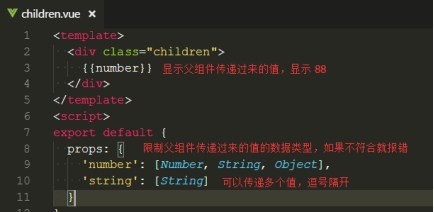
② 定义子组件
子组件通过 props 方法获取父组件传递过来的值。props 中可以定义能接收的数据类型,如果不符合会报错。
注意:像 number="888" 这样的传值只是传递一个字符串过去。如果需要传递变量或实现动态更新,需要使用 v-bind:number (或简写 :number)。
<!DOCTYPE html>
<html>
<head>
<meta charset="utf-8">
<title>Vue Props 示例</title>
<script src="https://cdn.staticfile.org/vue/2.2.2/vue.min.js"></script>
</head>
<body>
<div id="app">
	<div>
	  <input v-model="parentMsg">
	  <br>
	  <child v-bind:message="parentMsg"></child>
	</div>
</div>

<script>
// 注册子组件
Vue.component('child', {
  // 声明 props
  props: ['message'],
  // 在模板中像 “this.message” 这样使用 prop
  template: '<span>{{ message }}</span>'
})
// 创建根实例
new Vue({
  el: '#app',
  data: {
	parentMsg: '父组件内容'
  }
})
</script>
</body>
</html>2.3 列表渲染 (v-for)
<!-- 在模板 <template> 中使用 v-for -->
<ul>
  <template v-for="site in sites">
    <li>{{ site.text }}</li>
    <li>--------------</li>
  </template>
</ul>2.4 组件方法 (methods)
2.4.1 方法中调用其他方法
在 methods 中,一个方法可以调用同级别的其他方法。如果方法需要在回调函数(如 fetch 的 .then())中被调用,需要注意 this 的指向问题。可以使用箭头函数或在外部保存 this 的引用(例如 let _this = this)。
// ...
data() {
    return {
      MessageList: []
    }
  },
methods: {
    ReciveMassage(msg) {
      this.MessageList.push({
        id: 2,
        msg: msg,
        time: new Date().getTime()
      });
    },
    SendMessage(msg) {
      // 使用箭头函数可以保持 this 指向 Vue 实例
      this.MessageList.push({
        id: 1,
        msg: msg,
        time: new Date().getTime()
      });
      fetch('http://wx0725.top/project/api/youmoliaotian.php?type=html&keyword=' + msg)
        .then(response => response.text()) // 使用 response 而非 data,更符合 fetch 规范
        .then(data => {
          this.ReciveMassage(data); // 箭头函数内部的 this 指向 Vue 实例
        })
        .catch(error => console.error('Error fetching data:', error)); // 添加错误处理
    }
  },
// ...2.5 事件处理
2.5.1 回车提交事件 (@keyup.enter)
<!-- 如果是原生的input,使用 @keyup.enter 即可 -->
<input v-model="form.name" placeholder="昵称" @keyup.enter="submit">

<!-- 若使用了 Element UI 的 el-input,则需加上 .native 修饰符 -->
<el-input v-model="form.name" placeholder="昵称" @keyup.enter.native="submit"></el-input>三、常用库与技巧
3.1 使用 Element UI
3.1.1 Element UI for Vue 2.x
- npm 安装
$ npm i element-ui -S引入 Element
完整引入,在
main.js中写入以下内容:
   import Vue from 'vue';
   import ElementUI from 'element-ui';
   import 'element-ui/lib/theme-chalk/index.css';
   import App from './App.vue';

   Vue.use(ElementUI);

   new Vue({
     el: '#app',
     render: h => h(App)
});以上代码便完成了 Element 的引入。需要注意的是,样式文件需要单独引入。
3.1.2 Element Plus for Vue 3.x
- npm 安装
$ npm install element-plus --save引入 Element Plus
如果你对打包后的文件大小不是很在乎,那么使用完整导入会更方便。
   // main.ts 或 main.js
   import { createApp } from 'vue'
   import ElementPlus from 'element-plus'
   import 'element-plus/dist/index.css'
   import App from './App.vue'

   const app = createApp(App)

   app.use(ElementPlus)
app.mount('#app')3.2 网络请求 (Fetch API)
可以使用浏览器内置的 Fetch API 或 Axios 等库进行网络请求。 参考:fetch 使用详解
3.3 自动滚动到元素底部
// methods: {
//   ...
    Rool() {
      this.$nextTick(() => {
        let RoolHeight = document.getElementById('MsgBox'); // 获取对象
        if (RoolHeight) { // 确保元素存在
          RoolHeight.scrollTop = RoolHeight.scrollHeight; // 滚动高度
        }
      });
    }
//   ...